Camera Detection Tutorial
These instructions are a guide for teams who use Android Studio. Micro QR Codes on the Signal Sleeve are easily detectable and BoofCV is able to read these codes. For questions, reach out to [email protected].
1. Camera:
3. Expanding Android Studio memory
4. Add BoofCV to build.gradle in TeamCode.
api("org.boofcv:boofcv-android:0.41")
all*.exclude group: "xmlpull", module: "xmlpull"
all*.exclude group: "org.apache.commons", module: "commons-compress"
all*.exclude group: "com.thoughtworks.xstream", module: "commons-compress"
}
5. To use Vuforia, you require your own Vuforia Key.
6. Print off the Signal Sleeve with micro QR codes
7. Test! Run the CameraTest OpMode downloaded in step 2 and see if the telemetry values are correct in the driver hub.
8. Incorporate this code with your own code and use it in your autonomous programs!
1. Camera:
- On our robot, we are using the 720p camera included in the ftc robot starter kit.
- Most cameras are going to work just fine.
- Make sure the camera is named correctly in the driver hub. In the example code, we call the
camera “Webcam 1”
- EXAMPLE CODE FILE DOWN BELOW
3. Expanding Android Studio memory
- To use BoofCV, you must expand the memory on Android Studio to prevent errors.
- File >> Settings >> Appearance & Behavior >> System Settings >> Memory Settings
- Once in Memory Settings, turn all the values to their maximum.
- This change must be done for each developer.
4. Add BoofCV to build.gradle in TeamCode.
- Put these two lines at the end of the dependencies.
api("org.boofcv:boofcv-android:0.41")
- At the end of build.gradle, add these lines into the configuration.
all*.exclude group: "xmlpull", module: "xmlpull"
all*.exclude group: "org.apache.commons", module: "commons-compress"
all*.exclude group: "com.thoughtworks.xstream", module: "commons-compress"
}
- Sync project with gradle files.
5. To use Vuforia, you require your own Vuforia Key.
- Go to https://developer.vuforia.com/license-manager.
- Once you get your key, put it on line 37 in the quotations.
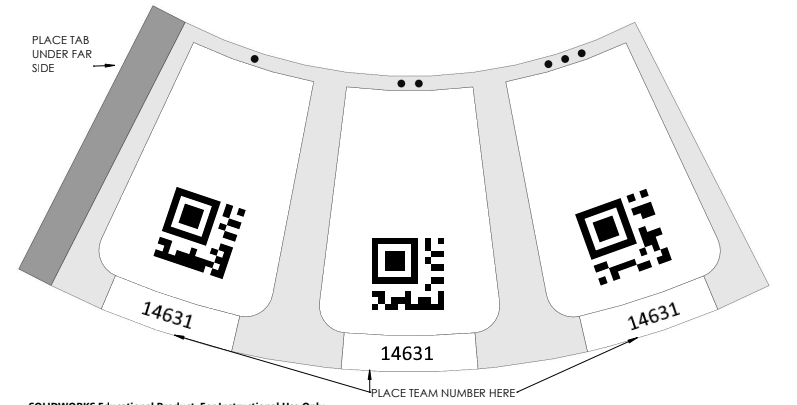
6. Print off the Signal Sleeve with micro QR codes
- SIGNAL SLEEVE DOWN BELOW
- Why micro QR codes? Regular QR codes were too curved when large and too small when preventing the curvature. To compensate, micro QR codes didn’t pose this issue and were more detectable by the camera.
7. Test! Run the CameraTest OpMode downloaded in step 2 and see if the telemetry values are correct in the driver hub.
- If you have any questions, feel free to email [email protected].
8. Incorporate this code with your own code and use it in your autonomous programs!
| cameratest.java |
| signalsleeve_-_microqr1.png |
